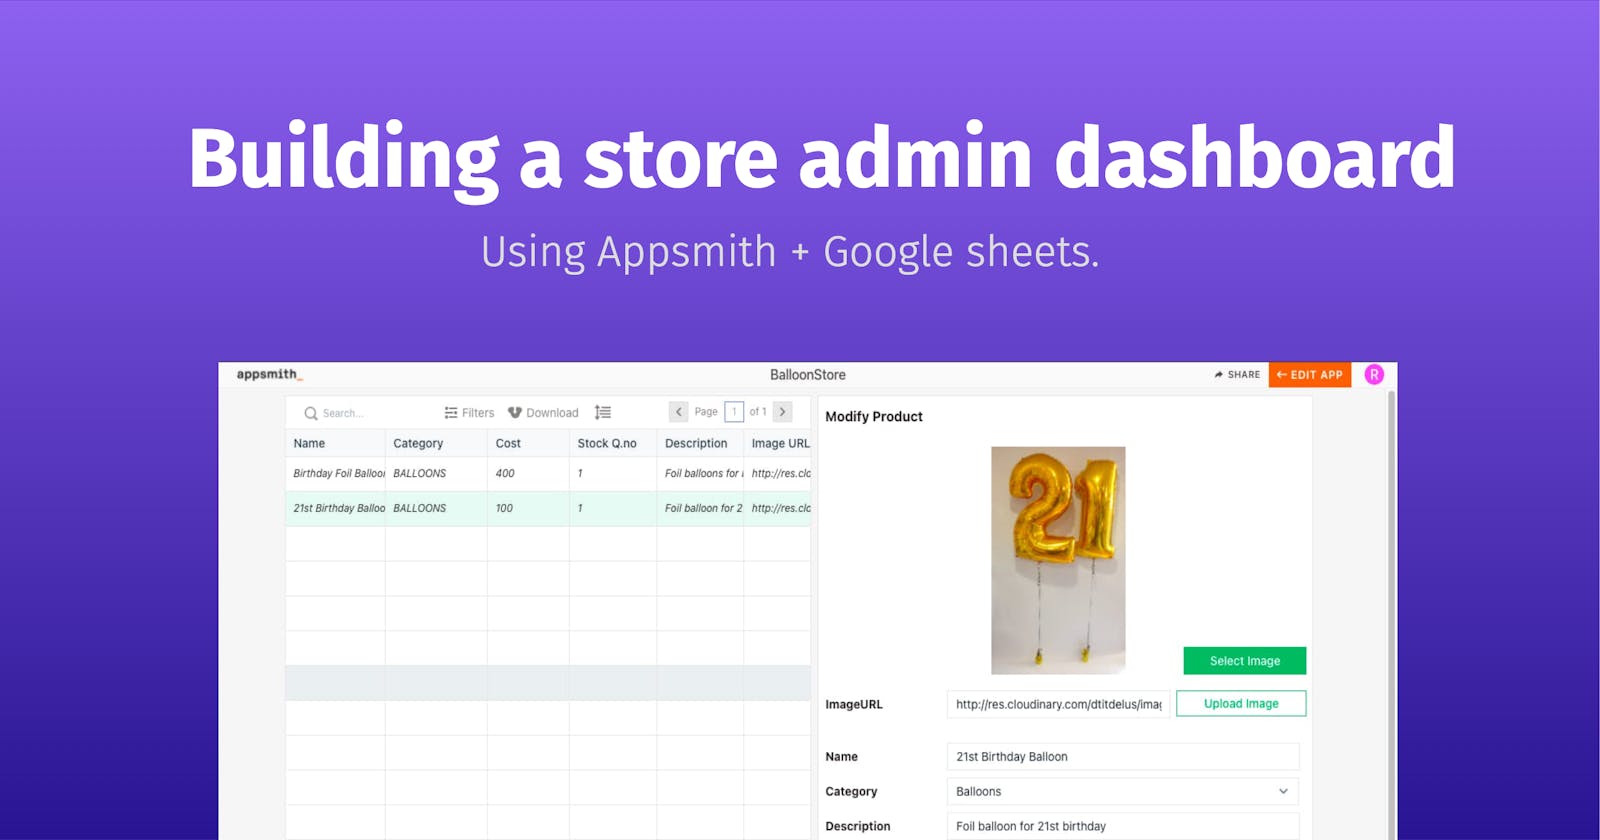
Building an admin panel using low code tools - Appsmith
Appsmith & google Sheets.


In the article, we will be building an admin dashboard that will help us manage the product data of a balloon's store website.
 The above image is a website's product page that fetches data from a google sheet acting as a database.
Our admin dashboard will use google sheets APIs to modify data.
The above image is a website's product page that fetches data from a google sheet acting as a database.
Our admin dashboard will use google sheets APIs to modify data.
Admin dashboard basic features:-
- Create a new product. ( Insert a row )
- Modify existing product details. (modify a row)
- Remove product. (delete a row )
We will use appsmith's platform to build this dashboard.
🤔 What is Appsmith?
Appsmith is an open-source framework to build admin panels, CRUD apps, and workflows. Build everything you need, 10x faster.
sounds cool? Let's build and see.
1. Create a datasource 💽
In this case, datasource is a google sheet so let's create a new sheet.
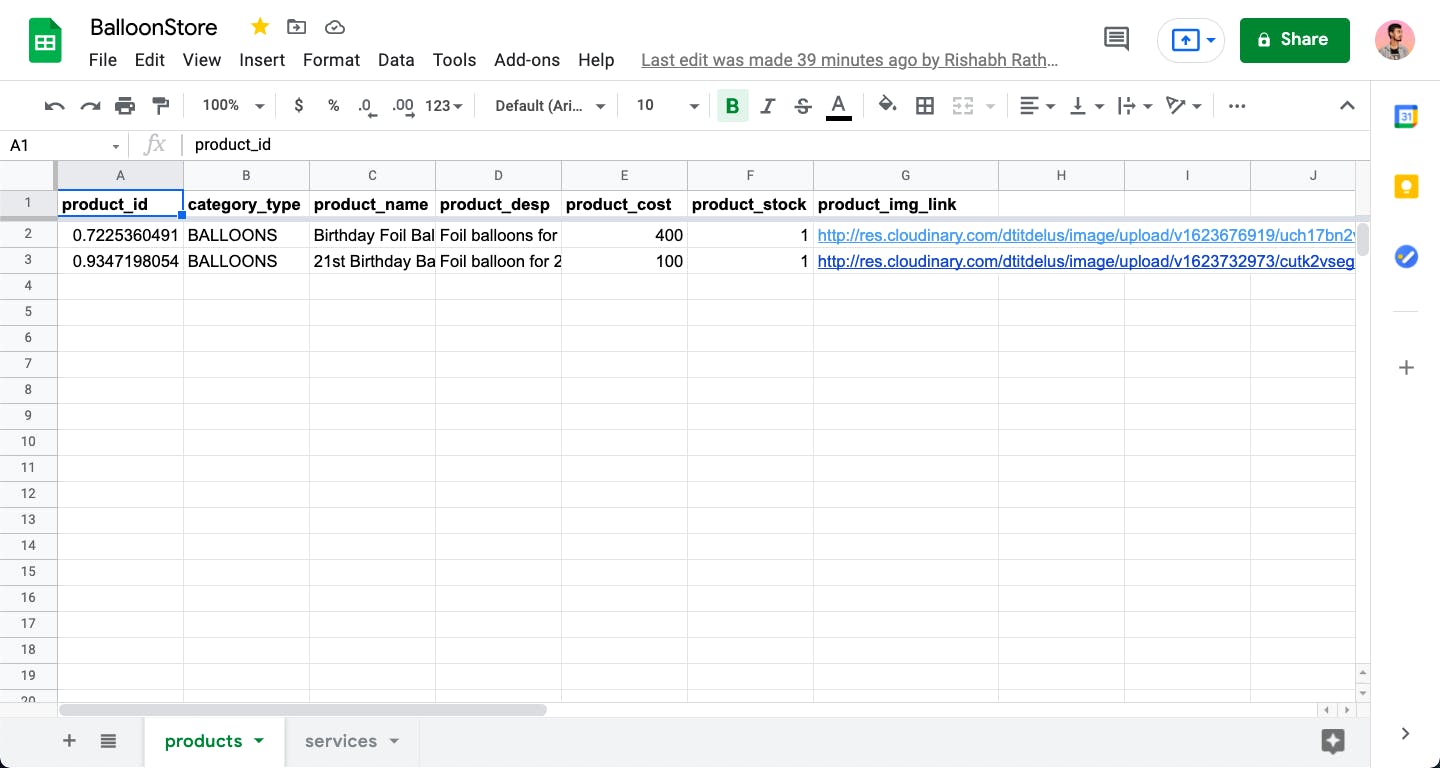
here we created a sheet for products with the column as
"product_id" ,  // unique id
"category_type", // product categories type like "BALLOON" or "FIREWORKS" or some other
"product_name", // name of the product
"product_desp" , // about the product
"product_cost" , // cost of the product
"product_stock", // stock quantity of product
"product_img_link" // image url
2. Integrate datasource to appsmith app
when you create a new appsmith app, you will find yourself here.
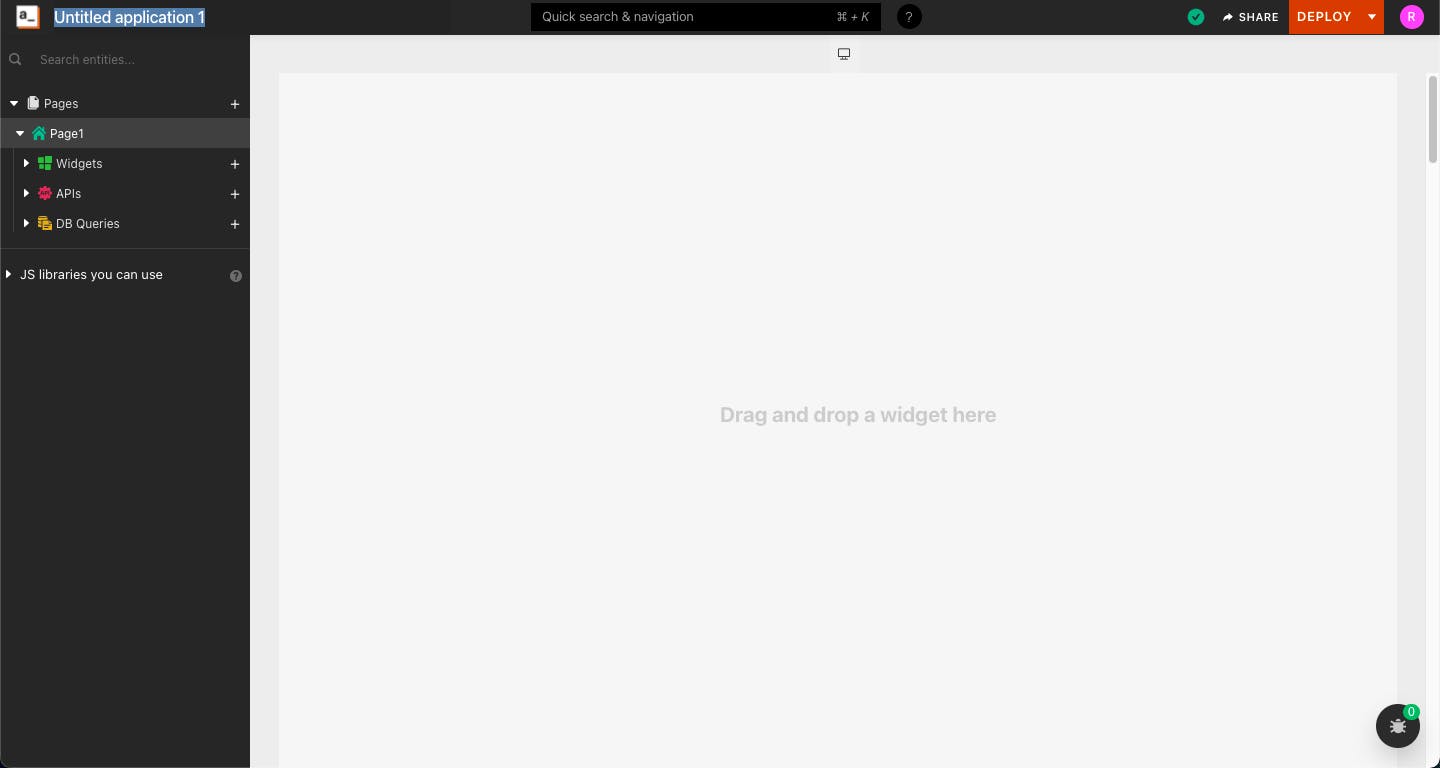 Click on Import APIs -> Choose Google Sheet -> Fill in the details.
It will add google sheet as a datasource and route to create a new API.
Click on Import APIs -> Choose Google Sheet -> Fill in the details.
It will add google sheet as a datasource and route to create a new API.
Refer Appsmith's docs to know more about google sheet integration.
3. Fetch data and generate widget to show UI
To get all the rows of the products sheet fill in the details as following
- methods:
fetch sheet rows - spreadsheet URL: paste your google sheet URL
- sheet name:
products
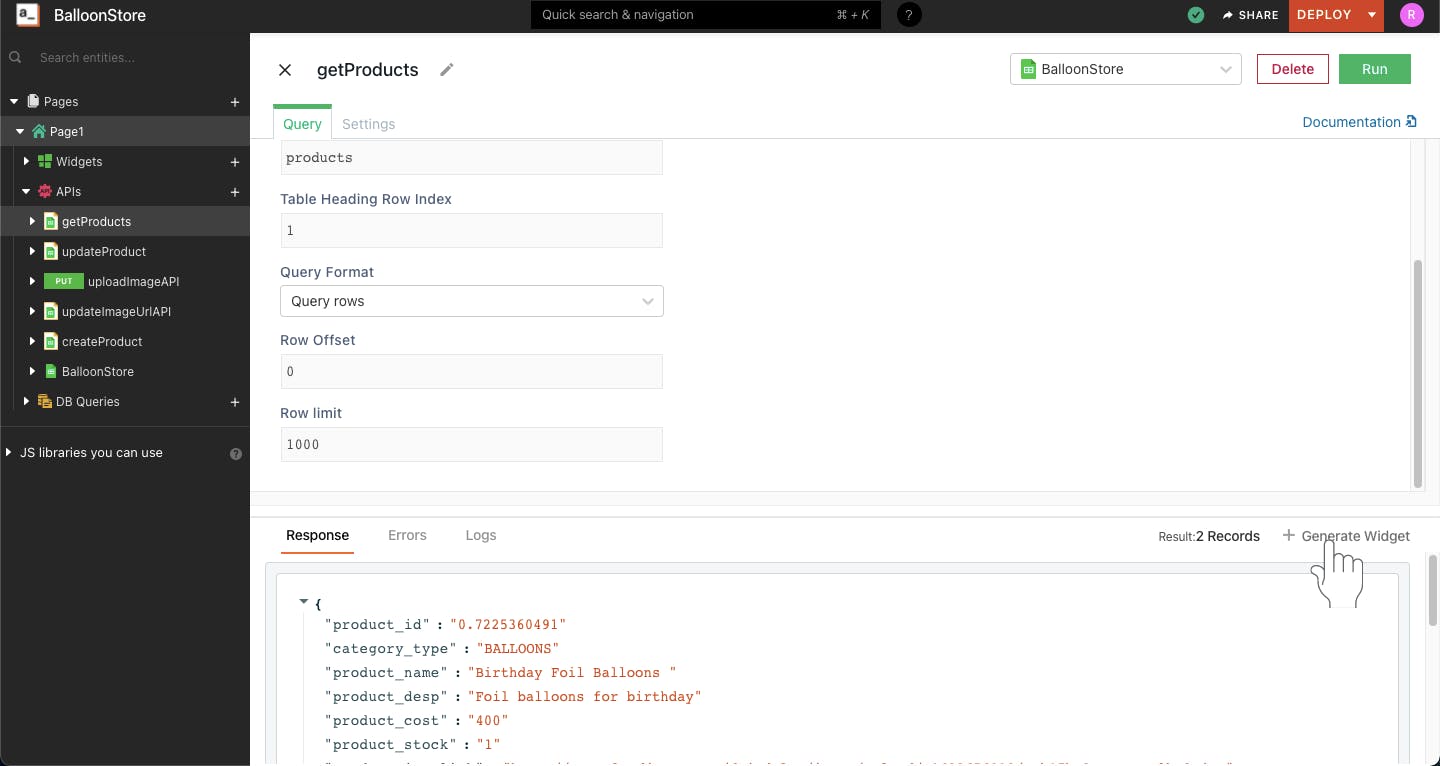
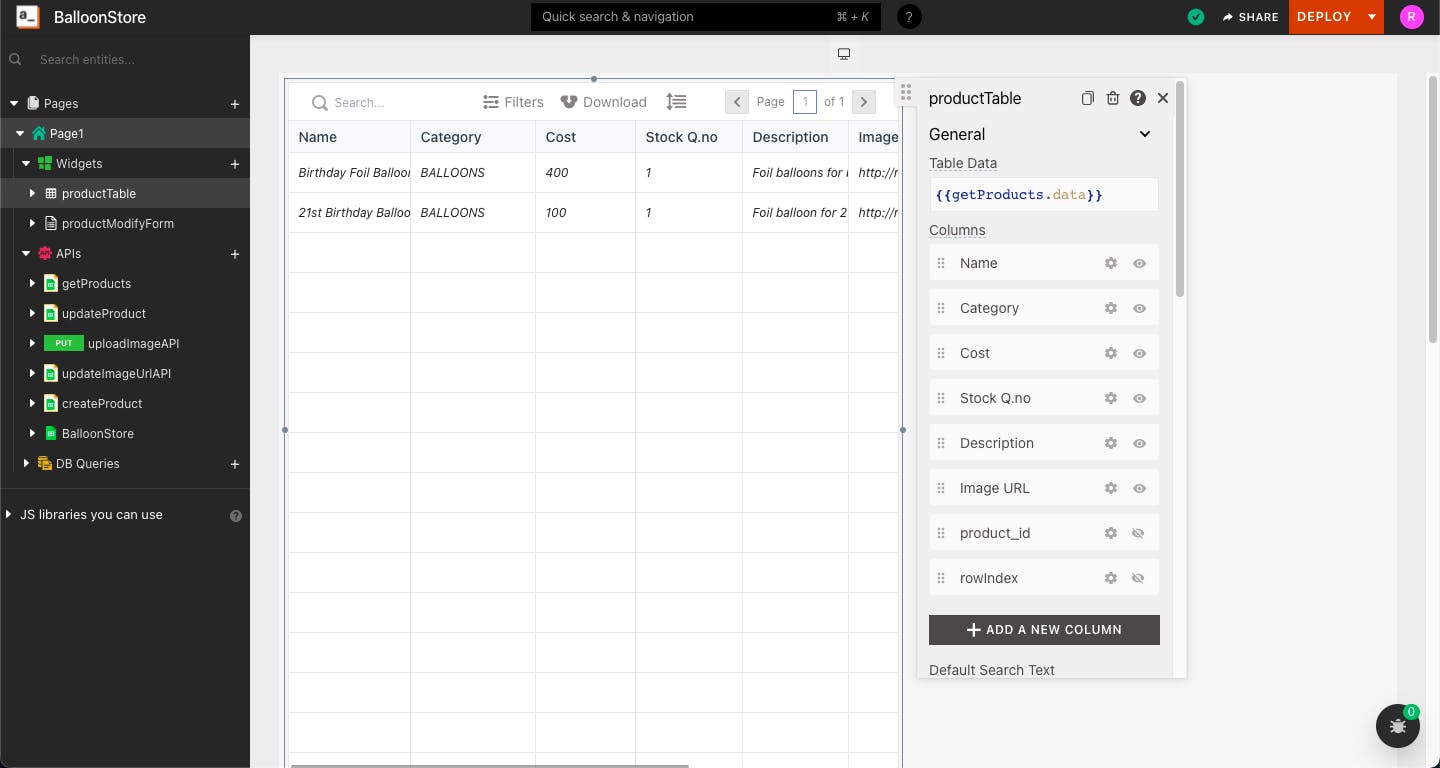
After a successful response from the API, click on Generate Widget to create a table rendering response data in a table.
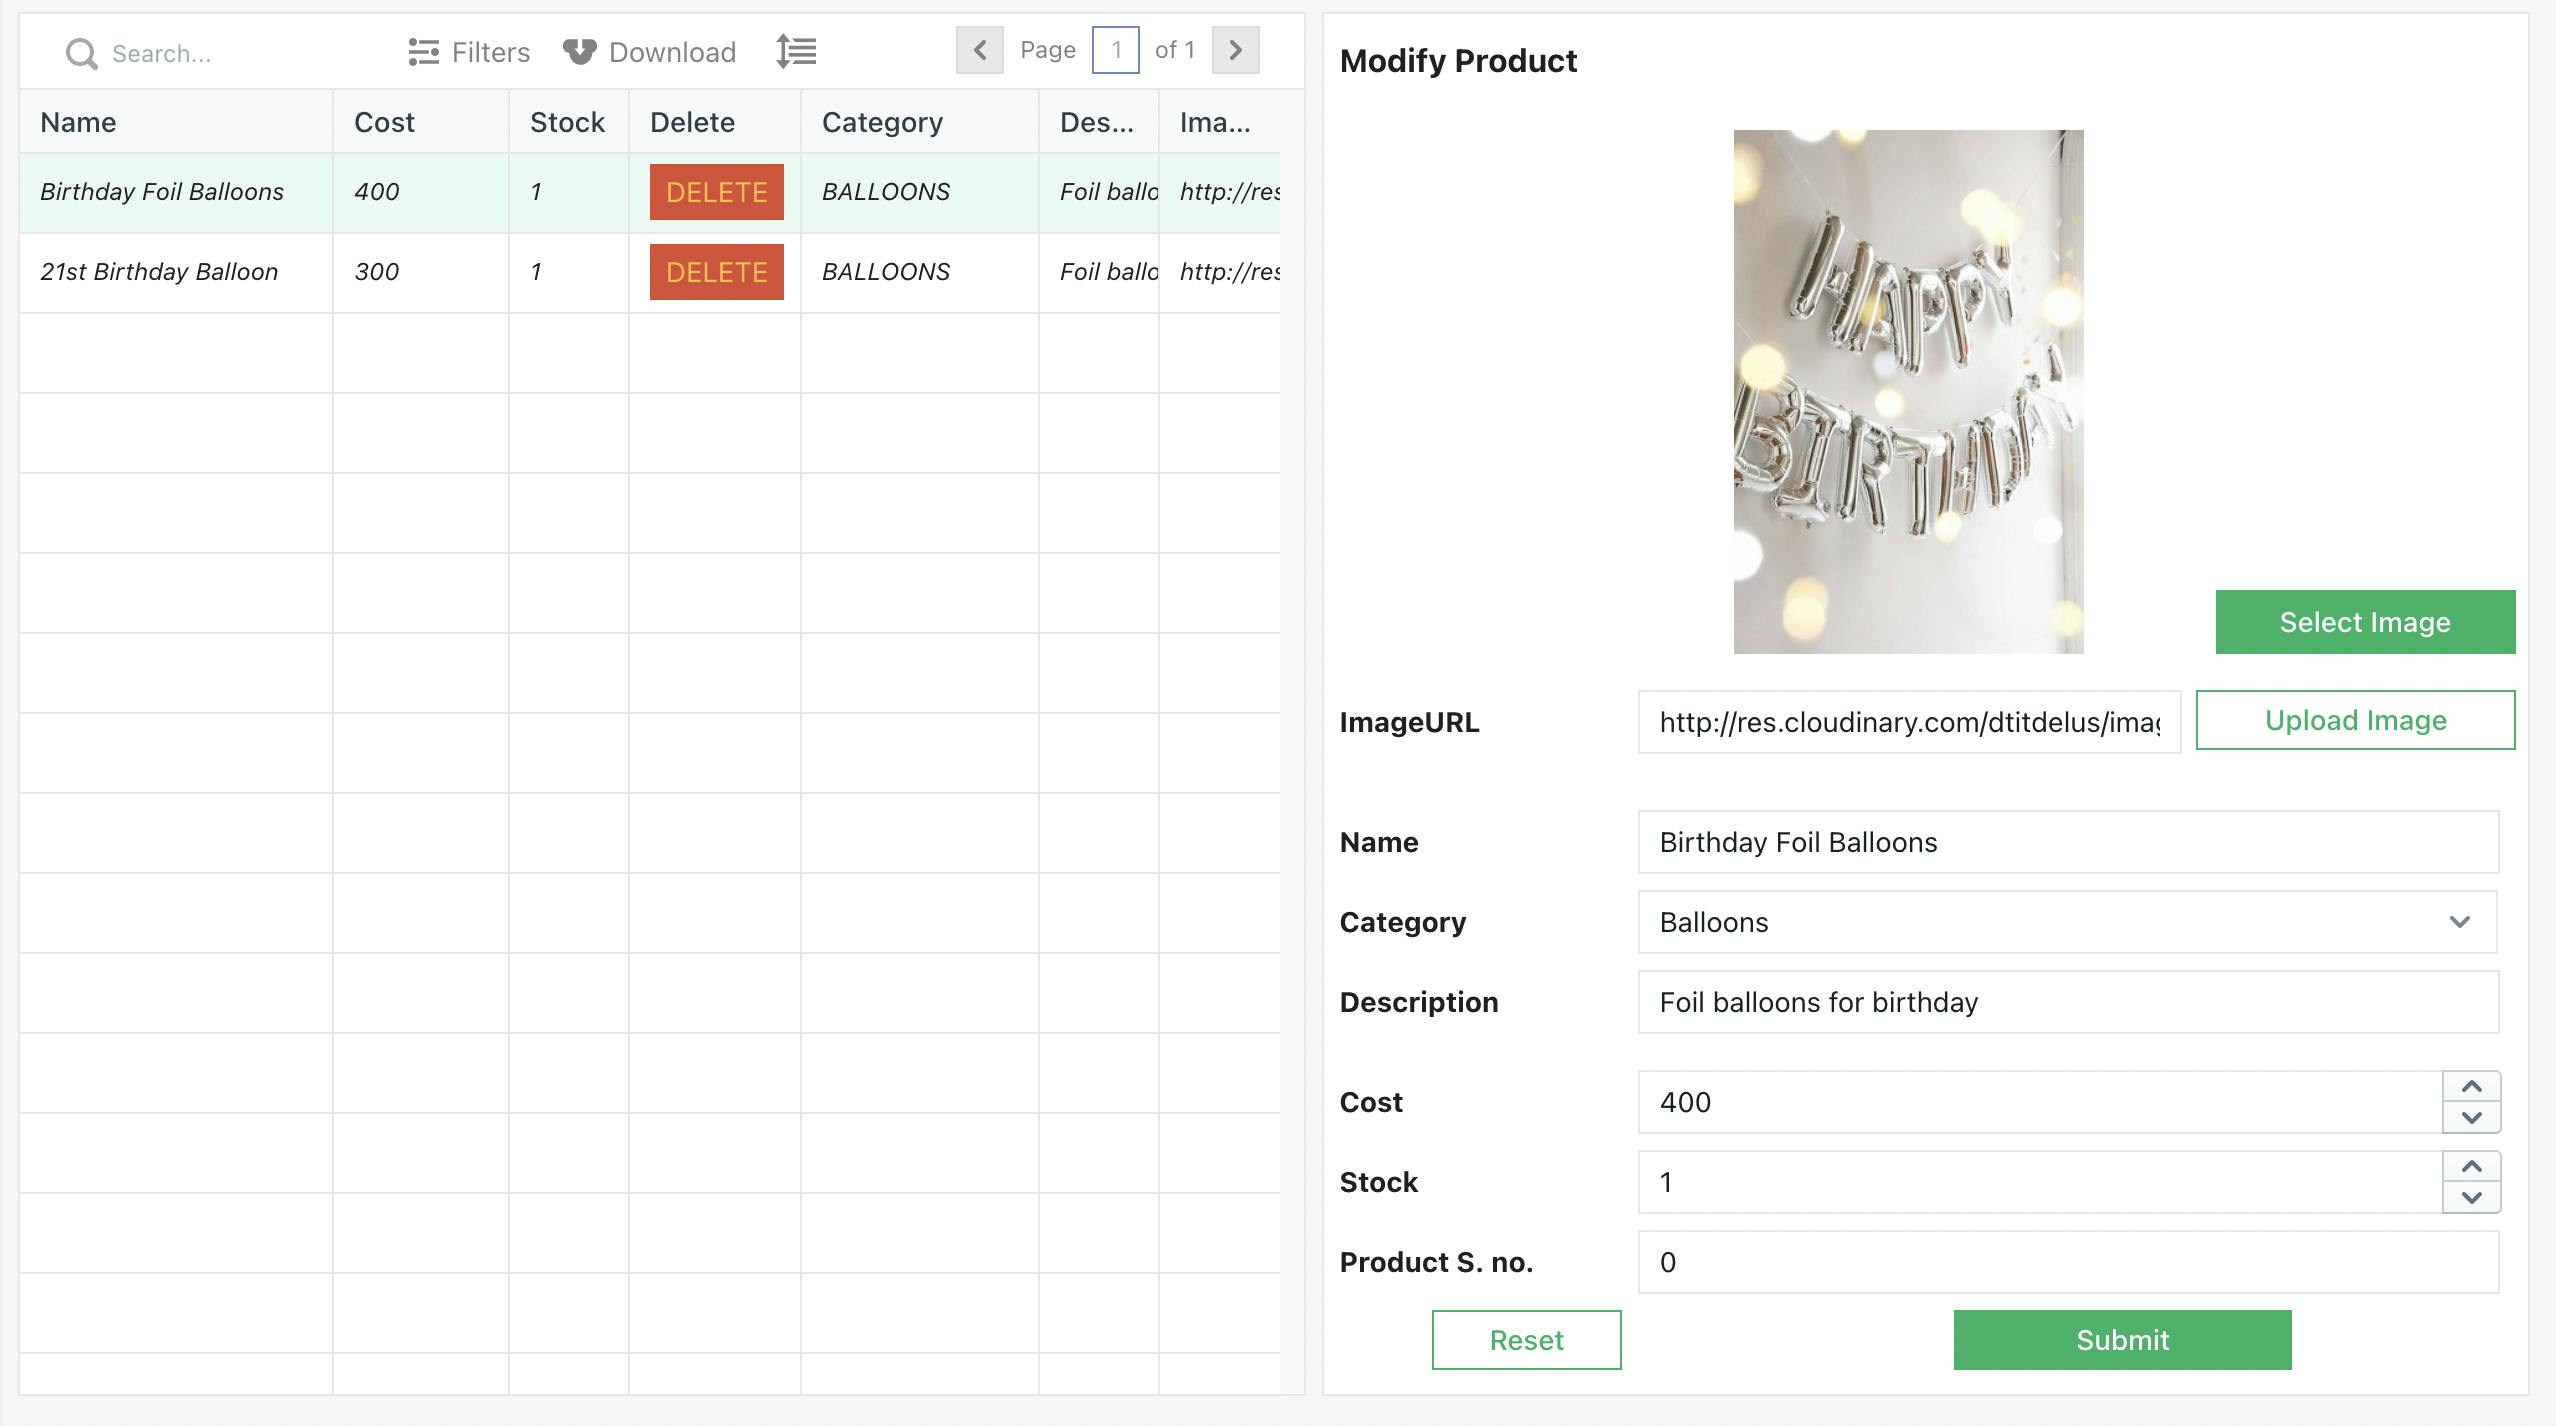
4. Modify data using Form 🔨
To create or update data in a row we will create a Form widget with an input field for each row of data respective to its type.
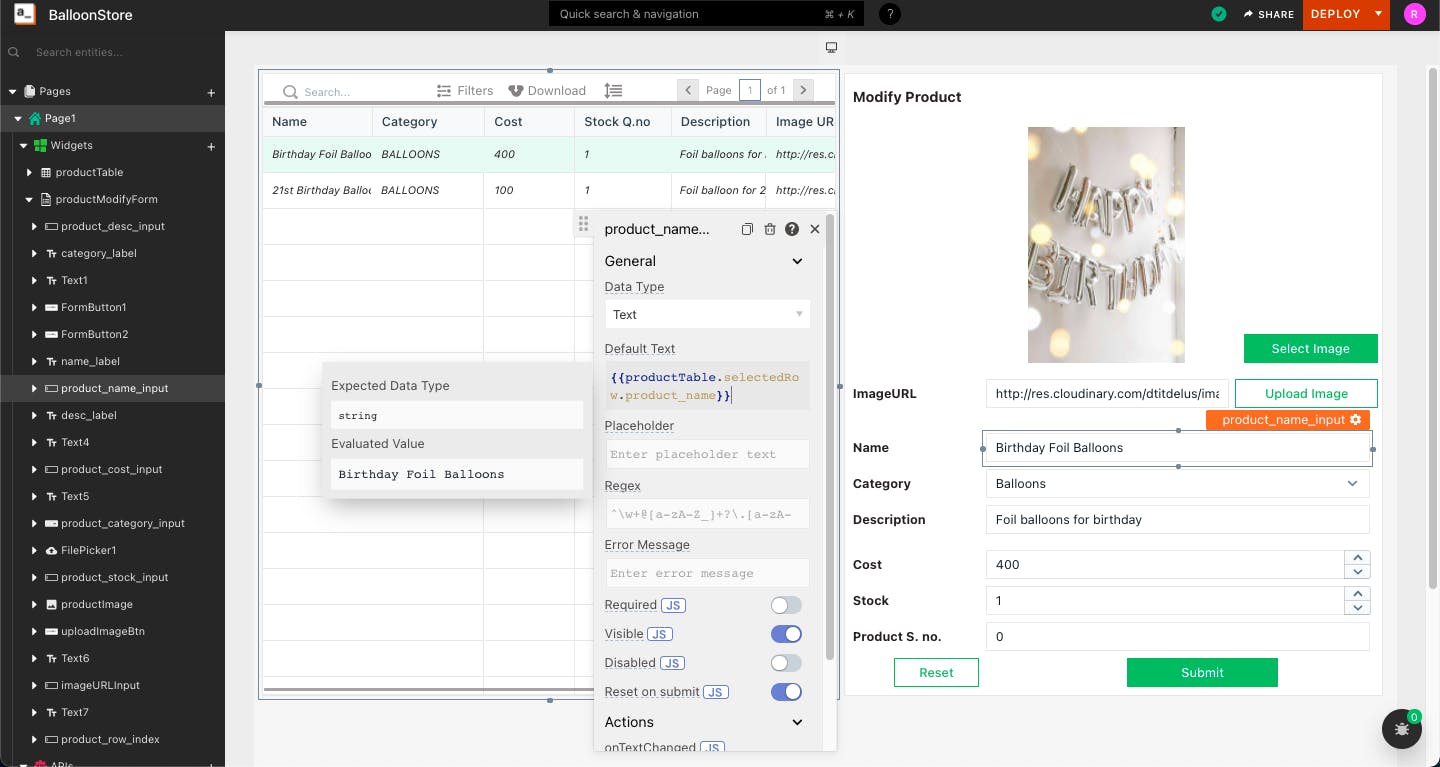
here I have created a Form called Modify Product with input field as follows -
// widget_name `<WidgetType>` = {{defaultValue}}
- Product Image `<Image>`  =  `{{appsmith.store.uploaded_image_link || productTable.selectedRow.product_img_link}}`
- ImageURLInput  `<Text>` = `{{productTable.selectedRow.product_img_link || demo_image_URL}}`
- product_name_input `<Text>` = `{{productTable.selectedRow.product_name || ''}}`
- product_category_input `<Select>` = `{{productTable.selectedRow.product_name || ''}}`
- product_desc_input `<Text>` = `{{productTable.selectedRow.product_name || ''}}`
- product_stock_input `<Text>` = `{{productTable.selectedRow.product_name || ''}}`
- product_cost_input `<Text>` = `{{productTable.selectedRow.product_name || ''}}`
- product_row_index `<Text>` = `{{productTable.selectedRow.product_name || productTable.tableData.length}}`
Refer the docs if you aren't familiar with read value syntax like productTable.selectedRow.column_name mentioned above.
appsmith.store.uploaded_image_link is used to read a value from the appsmith store.
Check more about the appsmith store here.
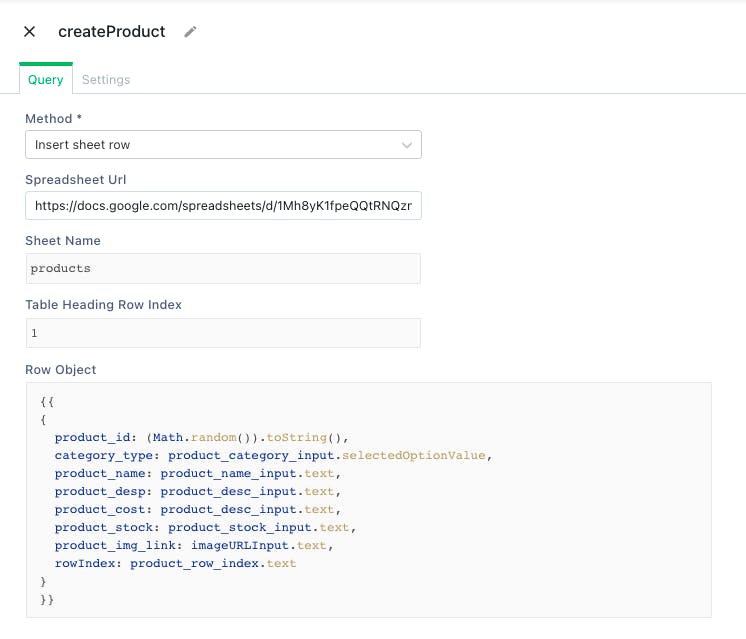
Create a new row
When a table row is not selected, we would assume that the user will fill Form to create a new product i.e., a new row.
In that case, we will need to create an API to insert a new row in google sheets.
- createProduct API
Update an existing row
- updateProduct API
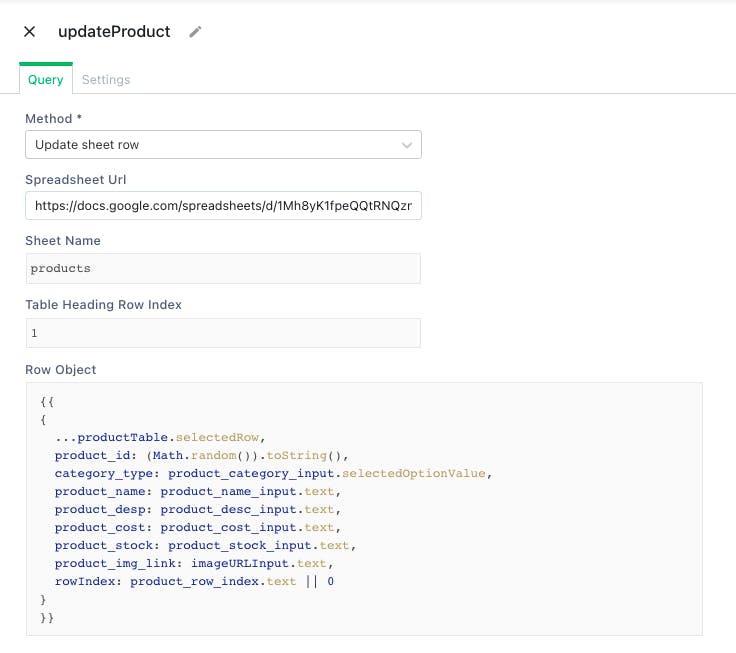
After both the APIs are created successfully. Now on click of the Submit button in Form, we would call these APIs according to the task.
Submit Button's onClick actions :-
onClick = {{
Number(product_row_index.text) <= productTable.tableData.length - 1 ?
updateProduct.run(
    // After successful
    () => getProducts.run(
    // clear
       () => storeValue("uploaded_image_link","")
), () => {})
: createProduct.run(
    () => getProducts.run(
        () => storeValue("uploaded_image_link","")
), () => {})
}}
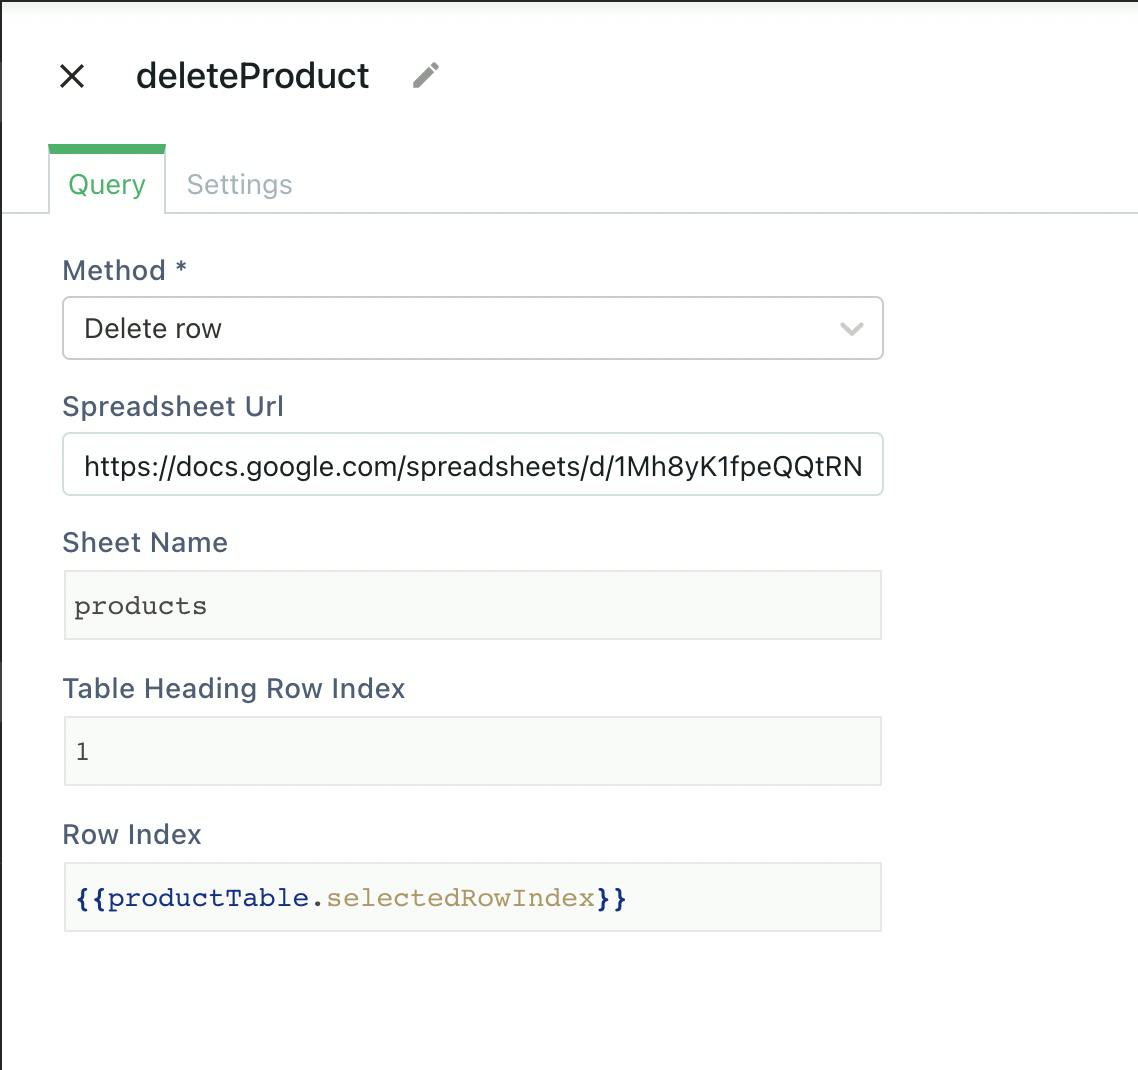
To Delete an existing row
Create a delete button inside the table as a new column and on click of which call deleteProductAPI
- deleteProduct API
5. Upload Image using Cloudinary 🌩
To upload an image to appsmith, we will use the Filepicker widget as shown below.
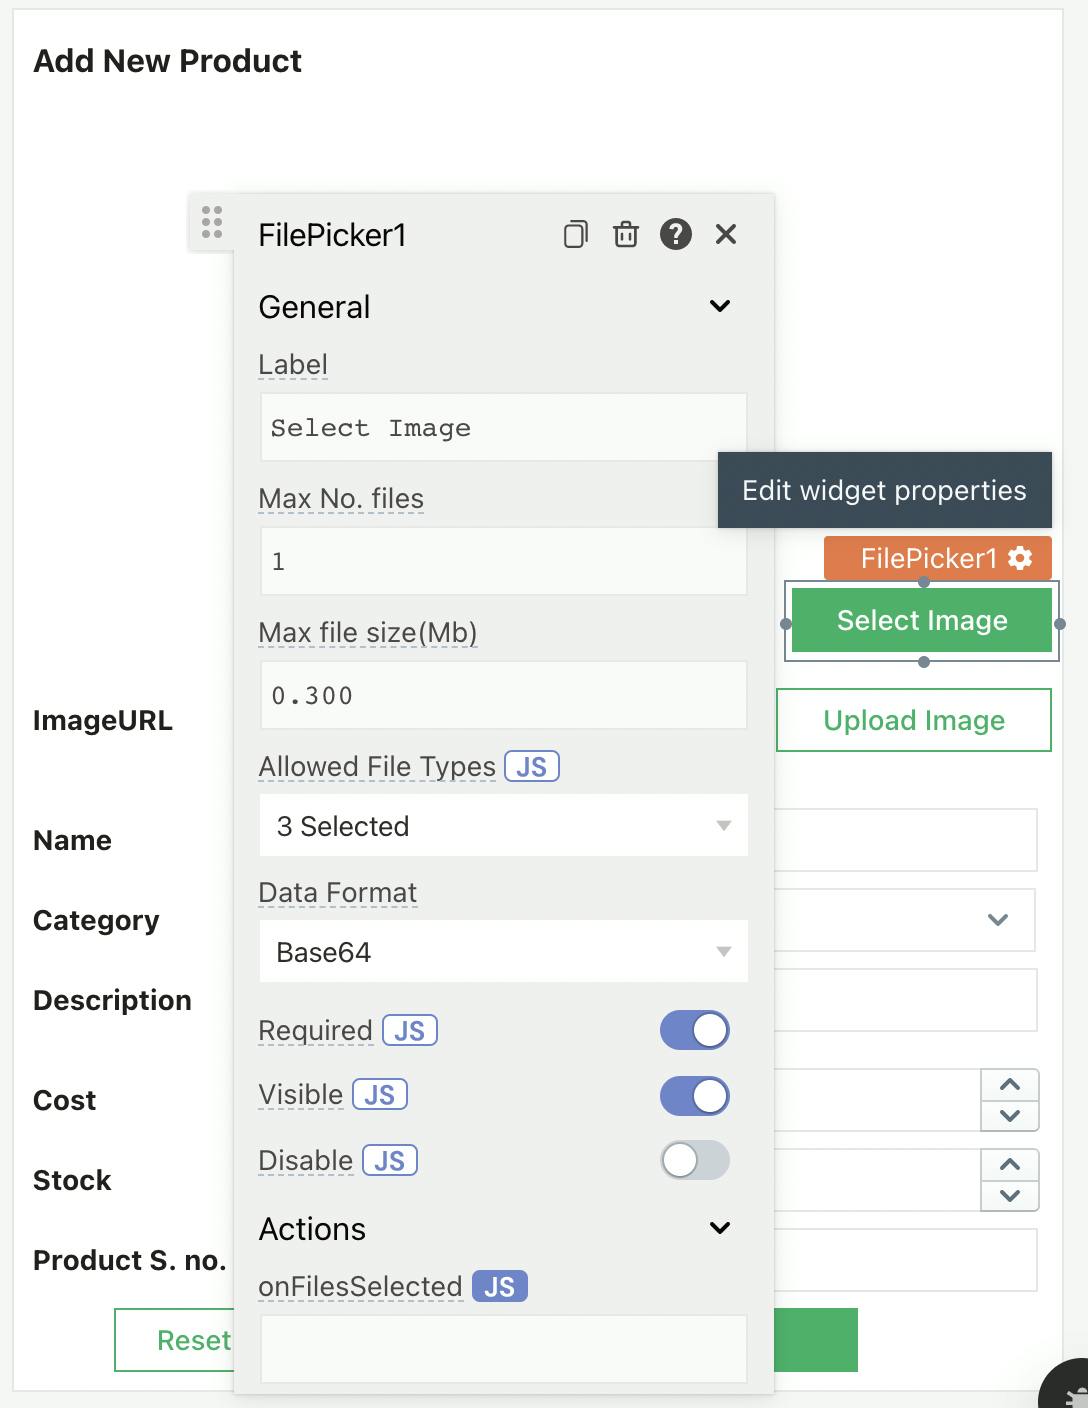
After this, I preferred adding an upload button separately on click of which we will upload selected image to cloudinary.
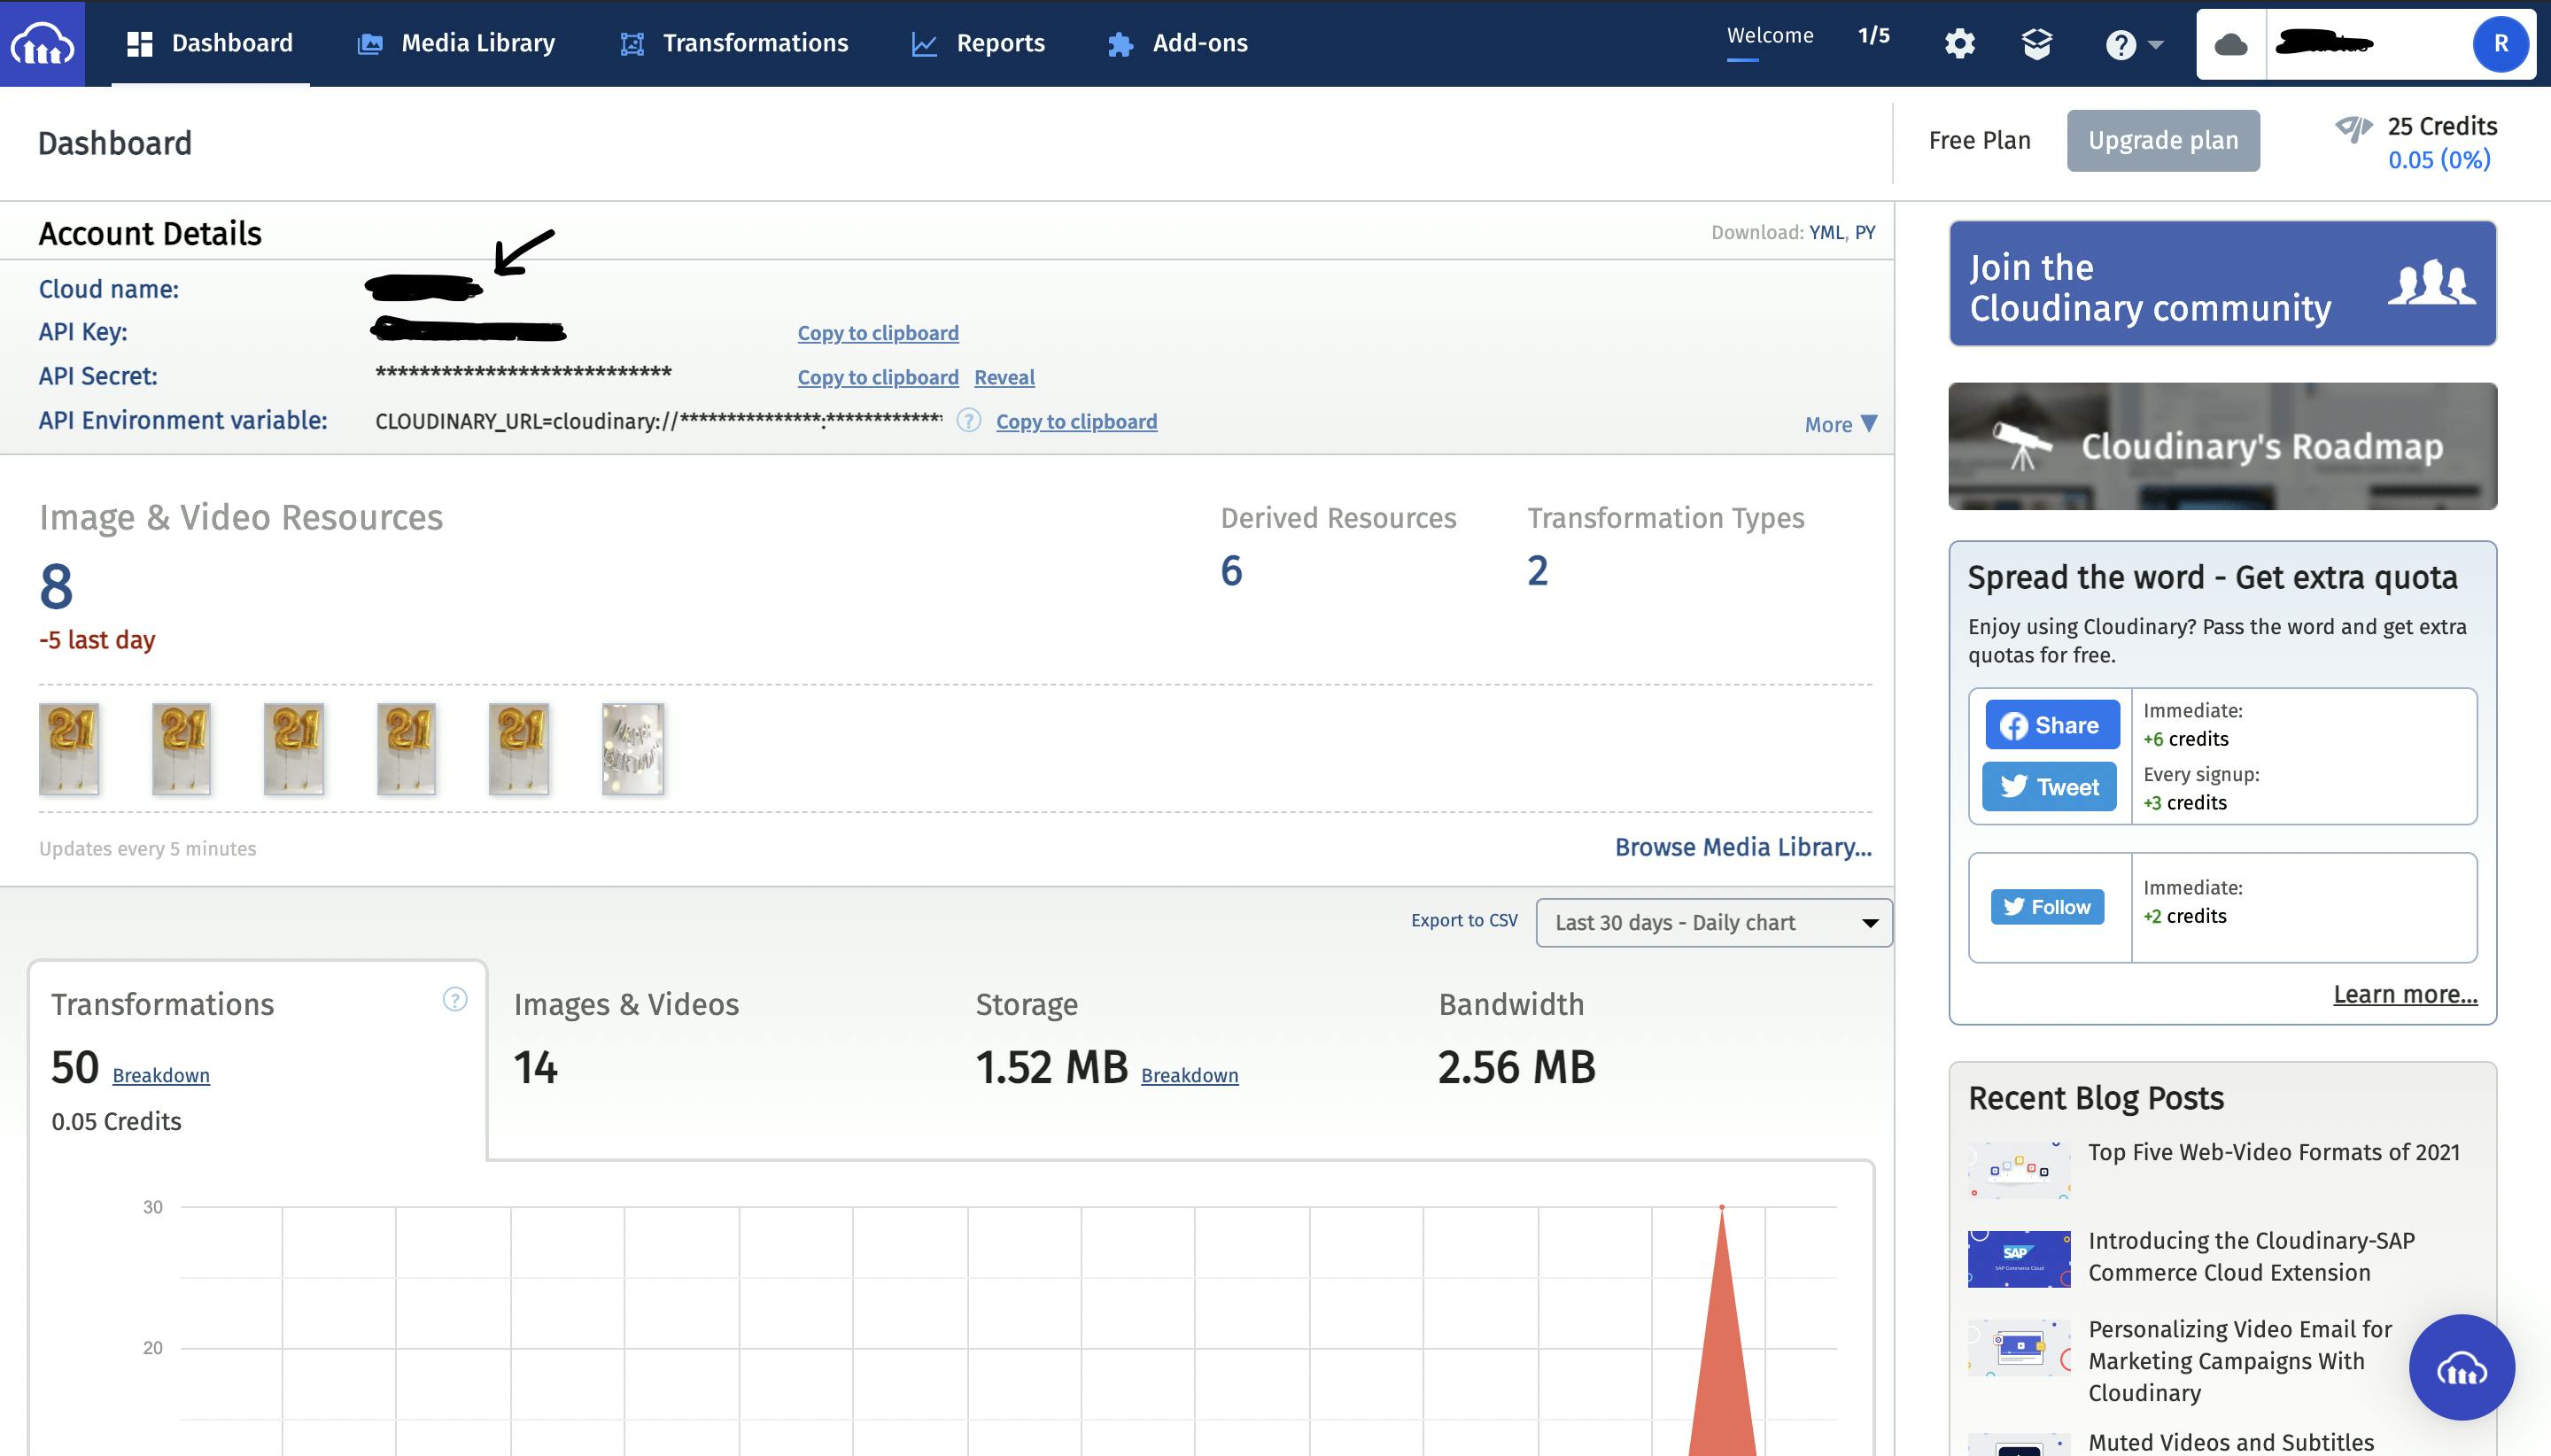
Now let's create an account in cloudinary and get your cloud_name and upload_preset which can be used to upload images using appsmith.
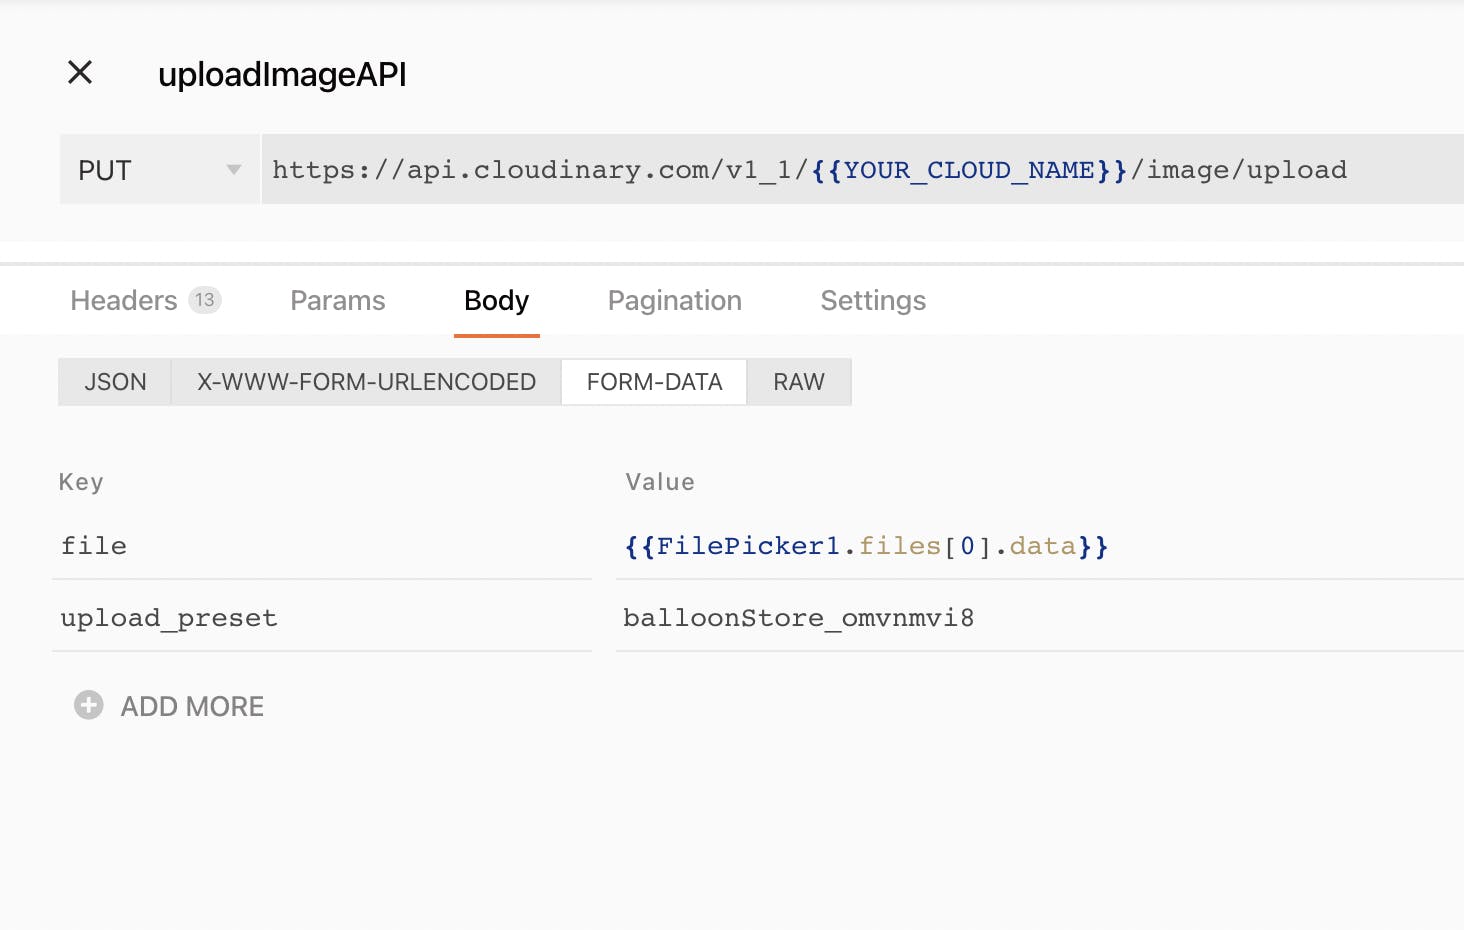
Now let's create an API to upload the image.
uploadImageAPI
Fill in the details as shown below.
FilePicker1 is a reference to the FilePicker widget.
Now, we can run uploadImageAPI when the upload Image button is clicked.
onClick = {{
  uploadImageAPI.run(
    (response) => {
      /* onSuccess */
      storeValue("uploaded_image_link",response.url);
      // here, we store the value which is then read using {{appsmith.store.uploaded_image_link}}
    },
    (response) => {
      /* onError */
    },
  )
}}
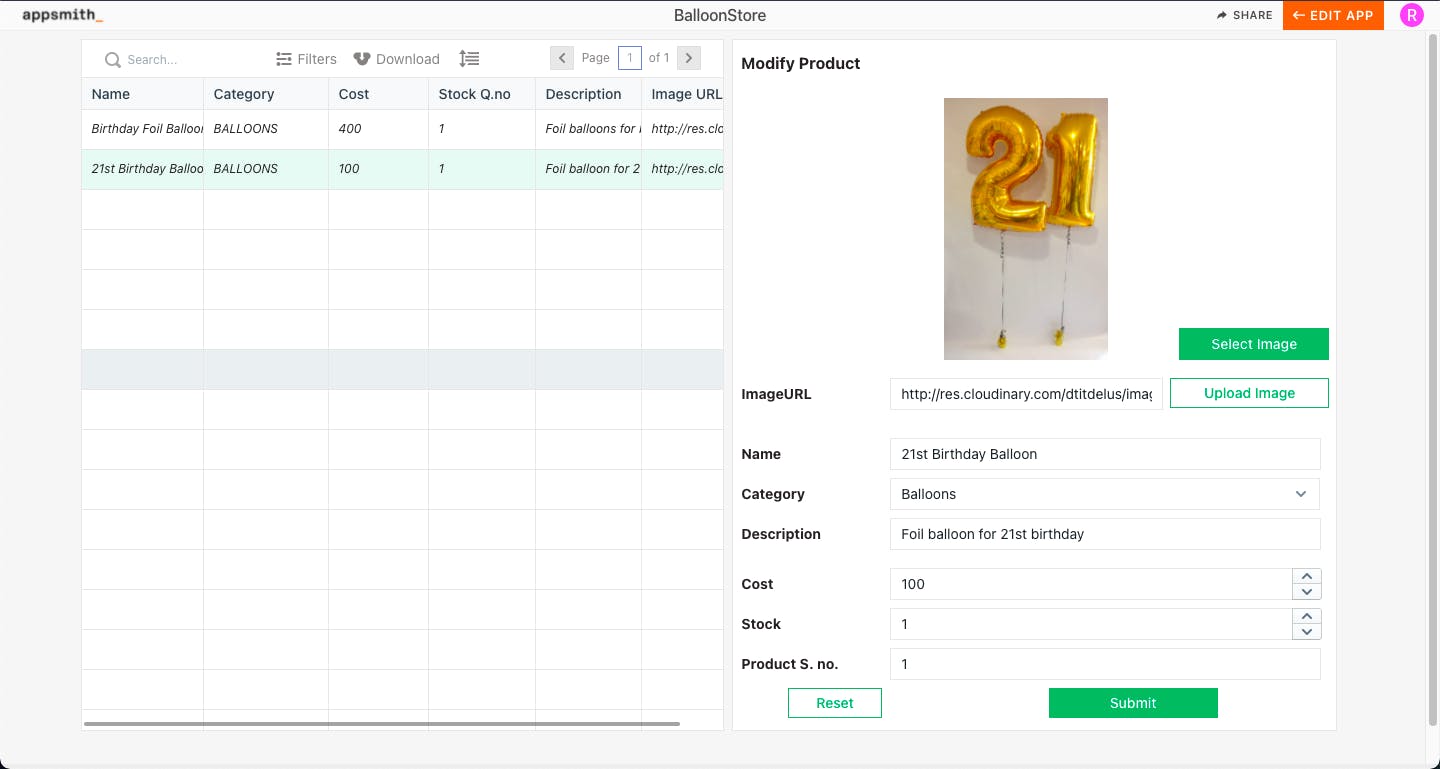
And it's done. 🎉🥳
That's how it looks. 🧐🤩